First Time Configuration Raspberry Pi 3 setup without monitor (Headless Mode)
This post will allow you to share WiFi Internet connection of the PC/Laptop with the Raspberry Pi which are connected to each other through a simple LAN/Ethernet cable connection at each end.
What you want to do:
- Share PC/Laptop’s WiFi Internet connection with Raspberry Pi through LAN/Ethernet connected to Raspberry Pi
What you have:
- Raspberry Pi B/B+/Pi 2/Pi 3 (If you’ve a Pi Zero, please try and let us know if this works on a Zero. I haven’t got a Pi Zero yet) running the latest Raspbian Wheezy. (I’ve not yet tried it with recently released Raspbian Jessie based off Debian 8. If you’ve been successful with this latest release, please post in the comment and I’ll update it here. Thanks.)
- PC/Laptop with WiFi Internet connection and a Ethernet Jack (LAN Connector / RJ45)
What you don’t have:
- Display Device for the Raspberry Pi (HDMI enabled display unit / Old TV)
- Direct Internet connection for the Raspberry Pi (LAN or WiFi)
SOFTWARES NEEDED :
- Standard Network Cable (Cat 5, Standard or Crossover)
- PutTTY Software (will be used to SSH into the Pi)
- SD Card Writer
The easiest way to go around Sharing WiFi with Raspberry Pi is to follow Striner’s method of Sharing WiFi with the Raspberry Pi.
I’ve tested it with Raspberry Pi 3 and Windows 10 and he’s tested it on Win 8.1 and an earlier Pi and should work will Raspberry Pi B/B+/Pi 2/Pi 3. This hasn’t been tested with Win 7, though it mostly should work. Please give a shoutout and let us know if you’ve tried on Win 7 and it works.
Method 1: Striner’s Method
Tested On: Windows 10 & Raspberry Pi 3 & Pi B (the Yellowish RCA model )
)
Known to work on: Windows 8/8.1 & Raspberry Pi B/B+/Pi 2
1.1 Open up the Network and Sharing Center settings and navigate toChange Adapter Setting
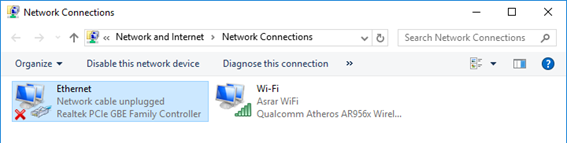 1.2 Right click on the Wireless Adapter and hit Properties
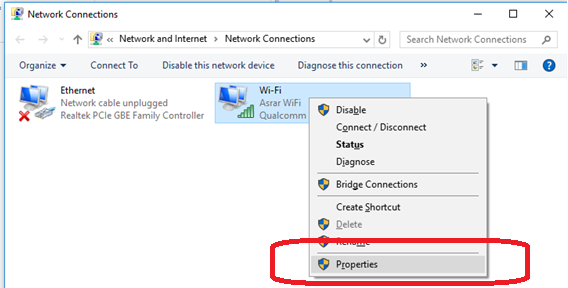 1.3 Navigate to the Sharing Tab and select the Allow other network users to connect through this computer’s Internet connection checkbox
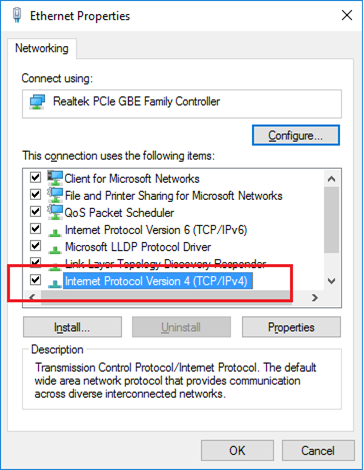
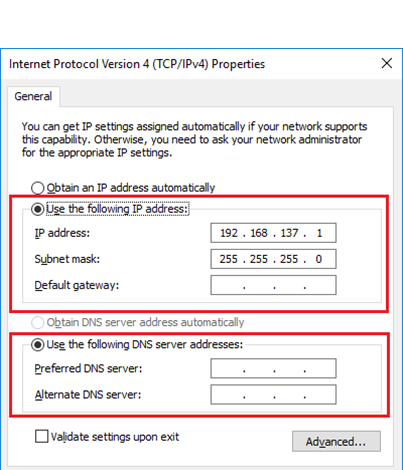
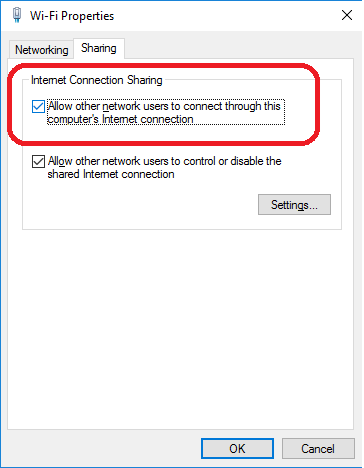 1.4 Now right click the Lan Adapter and hit Properties. Double click the IPV4 option and verify that some dynamic IP is populated (192.168.137.1in my example)
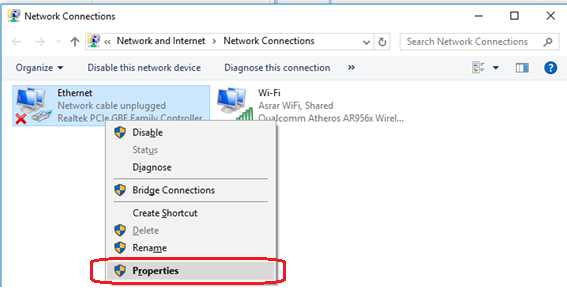
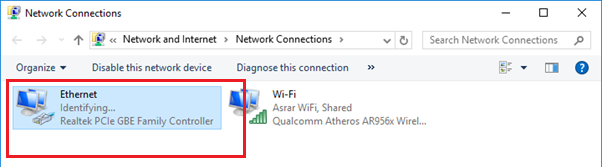
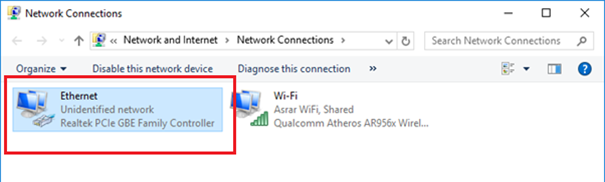
1.5 Now Power ON the Raspberry Pi (ignore if already powered ON :P) and connect one end of the LAN Cable to the Raspberry Pi and the other end to the PC. You should be able to see status messages Identifying…and eventually Unidentified network
1.6 Open up cmd prompt and type in:
ping raspberrypi.mshome.net
You should be able to ping the Raspberry Pi:
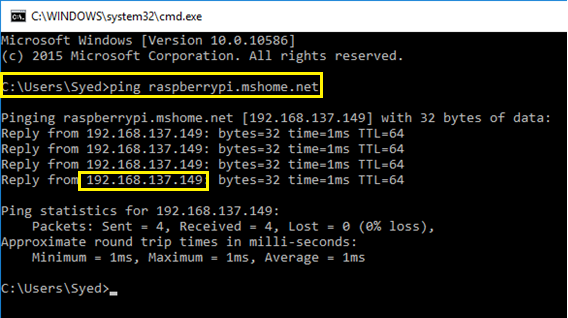
1.7 Open up Putty and set the Host Name as: raspberrypi.mshome.netand hit connect. (You can also use the IP address of the Pi revealed in the above ping prompt: 192.168.137.149)
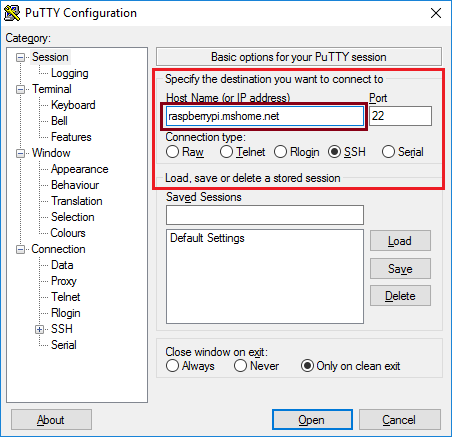
1.8 You should be able to see the login prompt. Hit pi and raspberry andEnter

1.9 You can now
ping www.google.com
(or any other website) from within the Shell and you’ll have response messages. Congratulations! Your Pi now is connected to the World Wiiiiiiide Web

Testing apt-get

Big Thanks to Danny Striner, who shared this method in a comment and tested it out. Full credit goes out to Striner. I’ve named this method as the “Striner’s Method” to honor him
P.S: If you run into issues trying out this method, please disable windows firewall and try again
No comments:
Post a Comment